Jaxon`s Shining Site

Version_2005_01_04


For designers: All settings for the materials should be adjustable already in your 3D-tool during designing.
It is not needed to do this afterwards.
If you like this effect, please do not use a texture for a window.
The best effect can be made just with the material settings.

Alphachannel

The FS2004 planes offer the possibility to add different reflections to parts of the models.
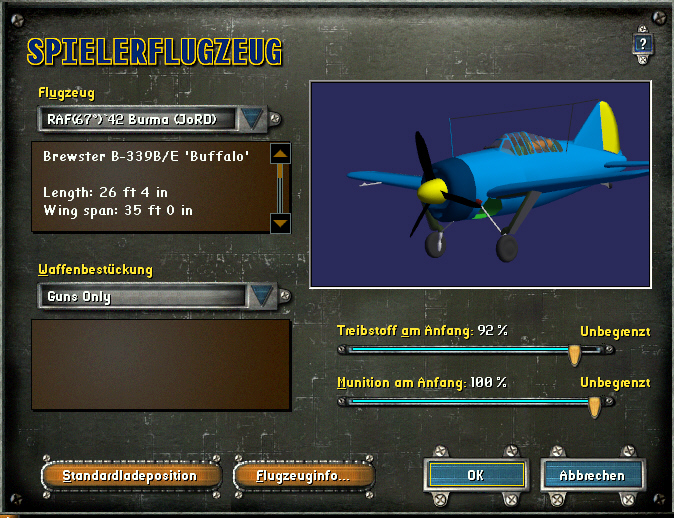
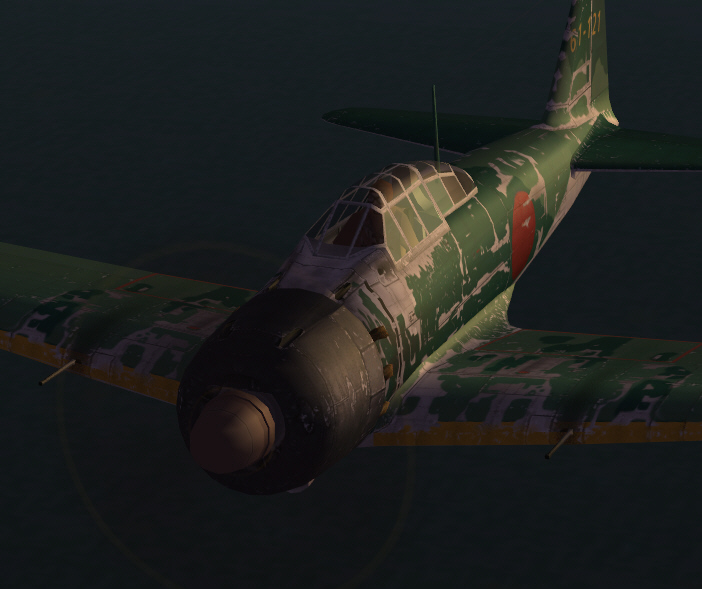
For example, really shiny, polished surfaces, like windows or mirrors, and on the other hand, very mat, dull surfaces, like tyres.

FS2004

Some textures feature additonal information in the so called alphachannel of the texture.

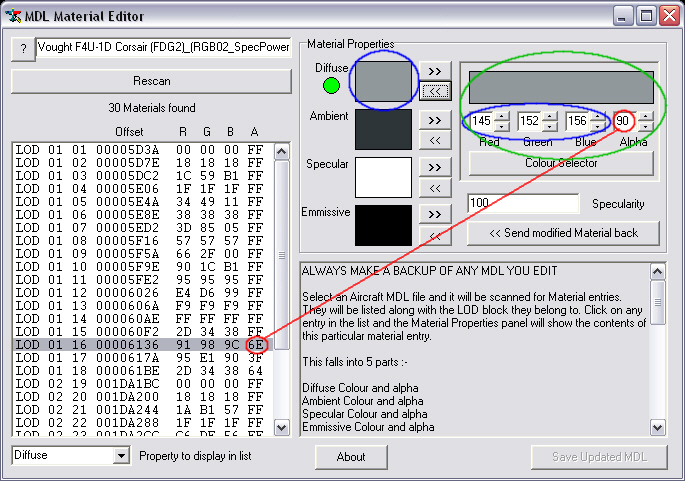
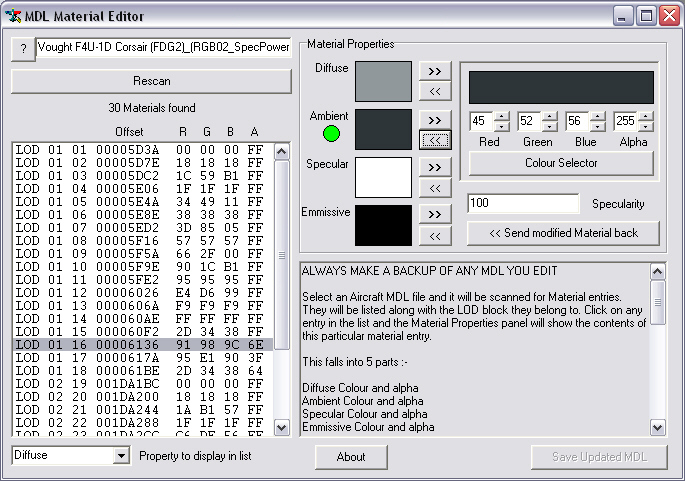
It is simply another greyscale pic for the actual image, in which some areas get another extra information.

In the earlier day, back when CFS2 came out, the alphachannel was used for defining the opaque-status of the texture, while the shining was defined inside the model.

White = Opaque
Black  = Invisible

Microsoft changed this in FS2002/4 in that way, that the opaque status is defined in the model and the information for the surface-shining comes with the texture.
Reason is, you can show small shiny things like blank rivets etc. this way.

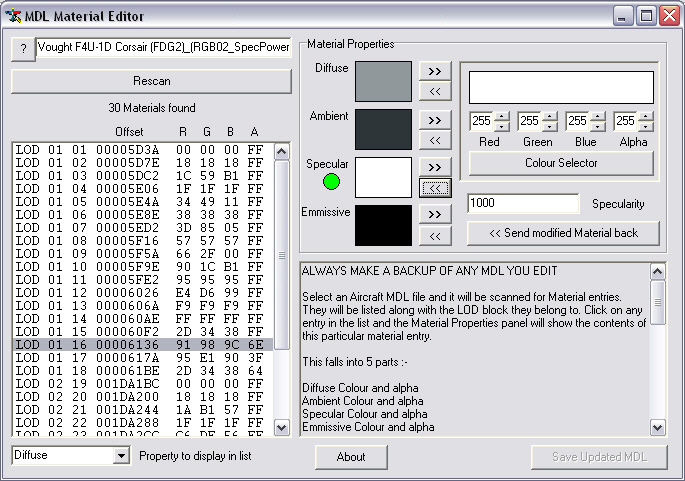
Now the information of the alphachannel is intended to be read as followed:

White = dull
Black  = full reflections, glossy


CFS2

When we convert a FS2004 plane back for CFS2 use, and don`t change the alpha-textures, the information is interpreted wrong by CFS2.

A black area on the alpha, what was intended to be very shiny in FS9 is now just very invisible in CFS2, what makes no sense !

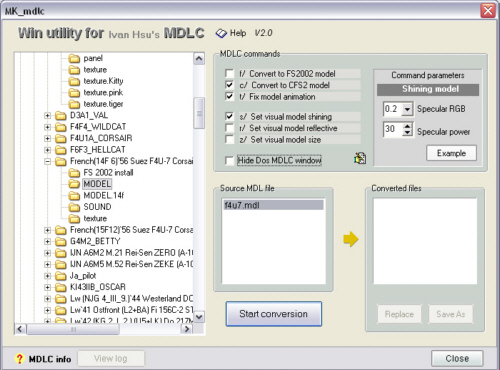
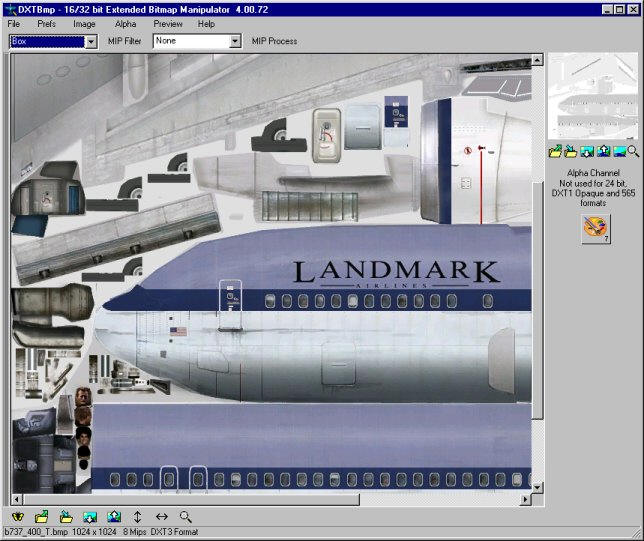
But there is help: We can open the texture with DXT.bmp and spend them a new, pure white alpha channel
Now or model is visible, but do not feature any shining anymore.

But didn`t you just read, old games have the shining option, too - only in the model ?

Right !

And that is what we want to add now !

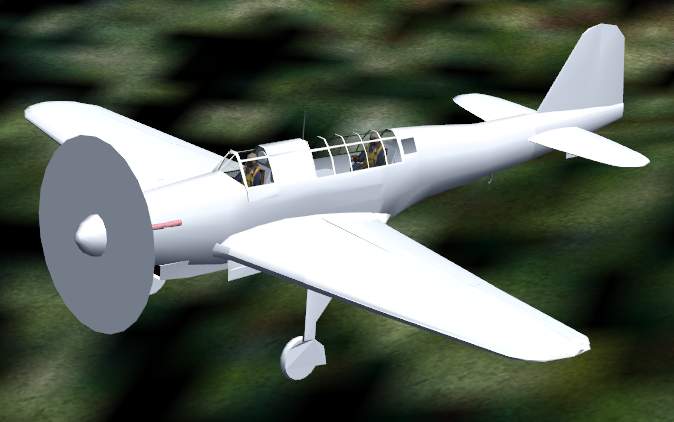
Of course, we can`t go to detail like rivets this way (only if all the rivets have their own material..), but we are able to shine whole parts of the plane, such like fuselage, pilots, WINDOWS and such (of course only when the designer spent each part and own material)

This is not needed, but it helps while designing and so 95 percent of all aircraft I have seen do have an own material for each part.


The Help

First of all, make a copy of your model you intend to tweak.
(Not only a security backup - we need it also for cross-checking later) - Done? Ok, lets start!

Step 00 - Preparation

For checking the actual settings, you need to remove all the textures from the planes texture folder, and evtl. also these in the CFS2-Root/TEXTURE folder
(propellers and other generic ones)

It is important, that the texture folder is still there, just empty - or the plane will not show up in the freeflight menu.

Many planes, like the Buffalo at right have already different colors for different materials, what is easier during designing.
This way it is very easy to locate them.

If the designer uses one color for all.
I color them manually while tinkering.

I do tinker while having CFS2 in window mode.
what is no problem.
Just make sure, you select another plane, when you are going to save your changed model.
Directly after, you can select your plane again and see the changes.

Step 0 - Shine the complete model

We can open the model with mdlmat directly and change each material, but I am too lazy for that, lol.

First of all I do spend ALL parts a general shine using Ivans Converter-Tool and Mortens interface.

A link to them is to find on my generaly tips page:
http://www.michael-reimer.com/CFS2/CFS2_Tips.html

Enable the Set visual model shining box and select The specular RGB and power like the example at right.

Update: In the meantime I like 0.5 and 10 more for olive drab planes, the settings at right are still used for planes with an overall metal-appearance, like P-51D Mustangs and such.

Step 1 - Polish the window parts - Reflection color

At the text field at left are the different LOD models and the materials found in there.
FS 2004 Addon planes normaly only have one LOD model, LOD2 is in this case the VC-model.
While all the normal materials have an Alpha of 255, what is FF in hexadecimal, the materials, you can look through, do have other numbers, and because of that, they are easy to find.

See red circle 6E=90.

The opaque status is only defined in the Diffuse Setup, all other Alphas should stay FF=255 !!!


The green area is your paint box, you can move a color in, change and move it back with the little buttons.

Select at right a grey around 150,150,150 and alpha 70-110

(90 is a good start)

You have still not changed the model, before you are happy with your result and press

           << Send the modified material back


Step 2 - Polish the window parts - Seethrough color

Normally not all part of the light is reflected when hitting a surface, some part goes through.
I found out, for glass parts it is better to use a darker color, and because I am a lazy boy, I change the just set color in that way, that I steal every R, G and B value just the first 1 ! and set the alpha to 255

145 is now 45, alpha 255

Probably hard to follow, so I try another description:

for Windows, I spend the

Diffuse : a light grey : 145/145/145 +Alpha 90
Ambient :
a dark grey : 45/ 45/ 45 +Alpha 255
Specular :
plain white : 255/ 255/ 255 +Alpha 255
Specular :
plain black : 0/ 0/ 0 +Alpha 255 (not lighting)

Step 2 - Polish the window parts

Yeah, polish it up !
Quick`n brite for eveyone, lol
 

Now comes the interesting part, Specular setting !!

Remember?

We first set all to 0.2, now we need the full power !

Set all to 255, R, G, B + Alpha, like it is to see at right !

What was the specular power before (10) gets full power now, too : 1000 !!!
 

If you haven`t done before, now is the time to press

           << Send the modified material back


Cool, Heh ?
(Reflections can be seen best in evening/morning sun)
Troubleshooting:

Glass and gunsights are not the only seethrough parts.

The moving propdisk and other textured seetrough parts need to be visible too, so the game knows it has to render the parts behind it, too.
If not, you can watch through the disc, but do not see effects and parts of the model behind it.
See the example at right, the Fairey Fulmar Mk.II by IS4G.
Unfortunately Corrado has used only one material for the entire plane including propdisk.

After several attemps, I had the idea to solve this problem:

I spent the Diffuse setting of the material an Alpha of 254.
(so it is just not completely opaque anymore)

That is not to see in the game, but the sim renders the parts behind the material!


Sometimes windows are textured.
In this case, you need to spend the material an alpha other than 255, but which does not effect the appearance in the game.
You need to change the alpha-texture of the glass/window-texture as well.

At right is a texture I use for this.
It is grey and has a semi-opaque alpha.

I use it to replace the green windows at Silvias planes or other textures with imperfect alpha-channel.

Just rename and replace the default texture.

JX_Glass_texture_Shining.zip

Step 4 - Enlight the VC gunsight & gauges

The VC-gunsight is of course a Window part, too - but a textured one.
When you enlight the part which is of white color, like at right, the texture will glow, it is just like if you enlight a sheet of paper with a torch from behind.

If a coloured image is printed on a white paper you will see the normal colors, if the sheet is colored too, the overall appearance of the image you see changes, too.

If you change the Diffuse and Ambient colors, you change the "Color of the sheet", if you change the Emmissive color, you change the "color of the torch`s light".

Guess, that is a good example how this works and I hope you get the idea of it and can imagine what happens when playing with it, if not try it out.

Gauges:

The Stock planes VC LOD-models have an own material for these. once you found the VC, it is just a little trial and errorto find it.


>Back to main CFS2 page<

© Jaxon 2006